How to Create a Field Sketchbook
Wednesday began the third week of an online natural history illustration course I am currently taking. It was referred to me by a friend who is a very talented illustrator and has done field work in exciting and exotic places including Madagascar. The course seems relatively harmless in that it takes a mere 6 weeks, the first of which asked us to collect a few pencils and test them out. That took me all of how many minutes as I walked across the dining room and dipped into my drawing cabinet? Maybe 15 if you include the testing of the materials. However, the instructors showed their true colors on week two. I was pretty relaxed having completed 17 percent of the total course with such ease. I was wrong. I was surprised, I was, and am, very busy.
Week two focused on the seemingly endless task of drawing found object from all different perspectives, adding copious notes, and then doing a landscape in pencil to practice habitat backgrounds. I spent a reasonable amount of time on the individual objects, measuring them and adding notes, but the landscape is what really killed me. Being used to painting landscaped with sweeping motions of the brush while drinking tea and listening to audiobooks, the fussiness of all the little pencil lined was tedious, to say the least- Oh, to have been able to grab my large Chinese brush and swash in a few layers, but the course is graphite only so I watched a row of French films on Amazon Prime to help me pass the time as I fussed with leaves.
Week three dawned bright and early yesterday with the assignment to begin keeping a field sketchbook. This book is so detailed that it can be later used to produce illustrations in the studio even when the plants, animals, etc... are no longer available. A treasure for the traveling artist who never has quite enough time.
I am enamoured of the methods of journaling put forth in this course, and I was thinking about the fact that one very seldom sees such carefully laid out instructions for using a field sketchbook.
Whether you are an artist, and illustrator, a travel writer, or a nature enthusiast I believe keeping such a field book can be invaluable to future projects. Therefore, I decided to share the methods and layout we are learning in the course with you.
First of all, you will need a sketchbook. One with a spiral binding or soft cover is ideal for adding photos and still being able to close it. My sketchbook is the Hahnemüle watercolor sketchbook which is A4 and horizontal rather than vertical. I like the paper and the fact that there is a rubber band to keep it closed. You can choose whatever you find functional or beautiful. A handmade sketchbook is a great idea as long as it is big enough. Your field sketchbook should be about A4 (normal printer paper size) to accommodate the amount of information you will want to include. Once you have one you like you should put your name address, telephone, number or e-mail address in the front. It would be a shame to lose it and for the finder to have no way of getting in contact with you to return it.
The layout I have created (in the loosest sense of the word) is intended to keep things neat and tidy so as to create an aesthetically pleasing visual diary while maintaining its high content.
In order to make it a valuable resource to you, certain elements are important. So I recommend using a double page for each entry. You may continue onto the next double page, but if you come to the end of an entry and have used only half of the double page, turn to the next to begin your next entry. Having two different subjects on the same spread can be distracting and in the worst case confusing back home when you refer to it at a future date. Adventures, outings, and natural beauty which seem to be so lucid, alive, and unique at the time we enjoy it can become faded and muddled up with other experiences as time progresses. So be consequent and label things.
Above is the layout from left to right-
Left Page: information, about conditions etc...; color swatch box, to record color; bounding boxes for special elements of your subject;
Right Page: Photo box to add detailed and contextual photos; presentation sketch, how the object is positioned in real life; and finally, notes.
Boxes
Creating bounding boxes that have the same proportions or sizes as the object you want to draw will help keep it as realistic as possible.measurements in mm
Using the white paper in your sketchbook and a ruler you can take an onsite photograph with more detailed measurement information for later use. Scientific illustrations are always in mm rather than cm- I just found out yesterday.
gesture sketches
These sketches record the movement of your subject as well as it's main lines. If your subject is alive, animal, person, etc..., I recommend using two pages to sketch it in different postures. This will help you to better understand it.


color swatches
Since Color is one of those things that doesn't really translate exactly on film, it is a good idea to use a few colored pencils or watercolors to record the true colors on your sketch. If you don't have colors with you try to do your best to describe the color, and then add it at home. An example of a good description might be, Red: cherry juice red without any purple, bright, intense, like fresh blood or candy.
detail close-ups
Since details are hard to see in photos, take a few close-ups of the parts you will be working on or will want to remember later on.photos
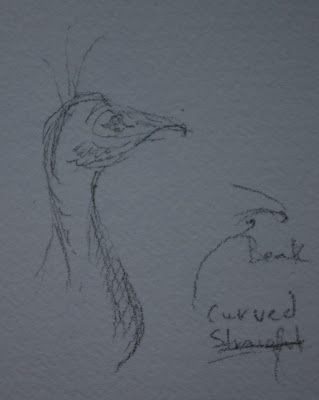
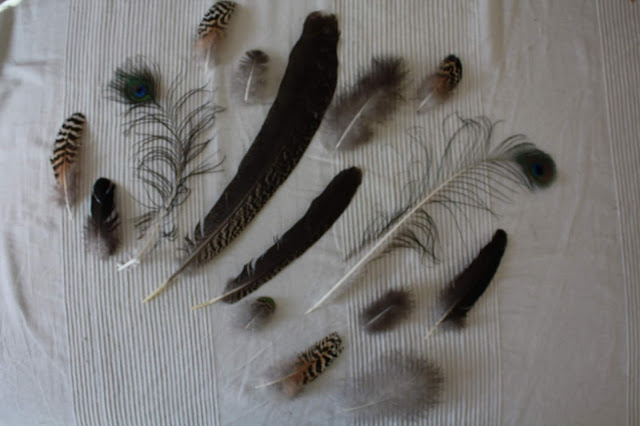
Take photos of the subjects whether buildings, animals, or plants in three sizes: In the context of their habitat (Landscape shot), as a whole (eg, the whole tree, animal, cathedral), and detailed with a measurement help (either a ruler or your hand).If you are recording people or animals it might be a good idea to capture a few movements or poses as well- be sure to record what the subject was doing in the notes section. In these pictures, the peacock was taking a dust bath.
presentation
Presentation just refers to how something looks three dimensionally. A quick sketch can tell a lot that a photo cannot.
Important Elements
There are often elements of the subject that need special attention, make sure to include these.Information; location, weather, time, date, subject
Notes
The last section on the spread is for notes, here textures, surfaces, colors, and other important things can be noted. These can, of course, be written around the sketches but I like the look of a separate box, leaving the illustrations clean and neat.
I hope you are feeling inspired to create a field sketchbook of your own and start recording your observations of the world around you.
Do you have a field Sketchbook? Let me know how you use it in the comments.
I post three times a week; Tuesday, Thursday, and Sunday. To get posts as soon as they are published click on the subscribe button at the top of the page or Follow by clicking on the follow button.
If you liked this post you might also enjoy:
-Current project- animal portraits a the natural history museum
-Pros and cons of sketching on location
-Nature and Medicine- A medicinal herbs identification Walk


Thanks Sarah, I remember you doing this last year a very helpful resource. I found a great little sketch book kit in a local supermarket. I'll take a photo and post it in the Facebook site
ReplyDeleteOh, excellent! Looking forward to seeing it. I love the exchange of information on the site. I bought so many books, thanks to the tips:)
DeleteGet soft, radiant skin with natural glow cream! A gentle formula that helps brighten your complexion and gives you a fresh, healthy glow every day.
ReplyDeleteThis comment has been removed by the author.
ReplyDeleteLoving the results from alovera gel moisturizer! It keeps my skin hydrated, smooth, and fresh all day without feeling greasy. Perfect for daily use on all skin types.
ReplyDeleteJust started using charcoal toothpaste and I’m impressed! It makes my teeth feel super clean, freshens breath, and helps with whitening naturally. Great addition to my routine!
ReplyDeleteIf you are looking for online tuition in Dubai for your kid, then we are here to serve you the best. Register yourself with Ziyyara to get affordable online tuition in middle east.
ReplyDeleteCall us - +91 9654271931 (India), +971- 505593798